TouchOSC, Pure Data, & Ableton Live
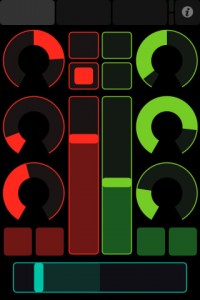
Posted on: May, 19, 2010, in I just got this great midi controller application for my ipod touch called TouchOSC. It’s a $5 app with a lot of bang for the buck. It was a bit of a learning curve to get started, although I did manage to create my own custom controller layout using the TouchOSC Editor and another free app called Pure Data.
There’s another app for $25 called OSCulator that creates a virtual midi bus and makes it easier to route the midi to CC#s. I just used Pure Data though, and routed it into Ableton Live through my IAC Driver which comes with the mac. It like I have a midi Jazz Mutant Lemar. Totally loving it! I can put any type of control in whatever layout I want. I can even add labels to each control, so I don’t need to remember where everything is.
When you first launch TouchOSC, you will need to put in the ip address of the computer you’re connecting to. Also, you’ll need to set the in and out ports. In the example downloads on hexler.net, those are 8000 outgoing and 9000 incoming. Once you have that setup, you can use the basic.pd to make sure it’s receiving data. Then open one of the pure data files that goes with a built in template for TouchOSC like the beat machine. Choose an output midi device from the Pure Data preferences. Enable that same midi driver’s input in your DAW.
You can use the TouchOSC editor to build your custom layouts pretty easily. Just open the editor, ctrl+click and choose the type of ctrl to create. Then just size and position it. Next, save and sync to your ipod/iphone/ipad. Once you click on sync, you will need to go into layout in TouchOSC, and press Add. Select your computer from the list. It should load the preset you created with whatever name you saved it as.
Here’s some tips for using pure data once you’ve built your layout in OSC editor:
1. Open one of the templates supplied by hexler.net into pure data.
2. You will see 4 different layouts. You can ctrl+click on the first and go to open.
3. Now, go to edit on the top menu, and click on edit mode at the bottom.
You can see that the top it says r page-1. Leave that alone for now. OSCroute needs to stay there too. Then after it put /fader or whatever your first control is. You will want to list all the controls on the page here with a slash in front. Pure Data will automatically add little nubs for each item. When you hover over a nub, your cursor will change into a circle. Then you can click and drag a connector to another nub. You’ll want to use only sliders and toggles in pure data even if the button is momentary. Also, for faders the *127 box goes before, and for buttons it comes after. Look at the examples to see what I mean. Last step is to set the ctlout which is the CC# sent to whatever app you’re using.
Once you get everything routed correctly go to Pd-extended >> Preferences >> MIDI settings. Choose an output device. In my case I used the IAC driver. If you don’t see it on the list, go to your Applications >> Utilities >> Audio MIDI Setup and activate the driver.
You will also need to go into your settings of the DAW you are using to make sure it’s receiving signal from the IAC or whatever midi bus you’re using. It’s easy to to in Ableton on the Midi panel. Just activate track and remote next to the driver input.
You can also use touchOSC with an app called OSCulator which is $20, and well worth the money. It’s far easier to understand than using pure data. It saves loads of time when making custom layouts for controlling midi with an iPhone, iPod Touch, or iPad.
Hope these tips have been helpful. Take it easy!
Comments
Tags: Ableton Live with TouchOSC and Pure Data, Building Custom Presets for TouchOSC, iPod Touch Midi Controller, Midi Control for iPhones, TouchOSC Midi Controller Tips, TouchOSC Midi Setup Tutorial, Using TouchOSC with Ableton Live
