Psytrance Sound Design Using Ableton
Posted on: August, 21, 2012, in by DJ Story
This tutorial is for learning some basic sound design theory to get you started making custom psytrance sounds from scratch. I can’t stress enough how important it is to just dive in and start getting your hands dirty. The more you get familiar with how the different wave forms sound at different qualities, octaves and frequencies the sooner you’ll be able to whip up the sound in your head without spending hours and hours struggling. It may be challenging to learn the controls on your synth or sampler at first, but the payoff is huge! So without further ado, here are some tips for those interested in using sound design techniques to create some of the sounds commonly heard in psytrance.

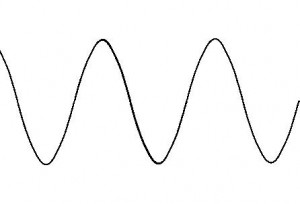
Sinewave
#1 Psytrance Kick Drum
Psytrance kick drums can be made in many ways, and the best way to find a sound that fits your style and taste is to experiment. Here’s some tips to get you started. The pitch of the kick should start high and descend about 24 semitones (or whatever sounds good) very quickly using an envelope to create a punchy sound. It can be done using any synth. I’m using the simpler with a smooth sub bass sinewave loaded in just to show that it’s possible, but really any synth can generate a sinewave. I played around with the transpose and pitch envelope settings along with the volume envelopes until I got the basic sound I was looking for. Next I added a saturator with 4db of drive to phatten it up.
My psytrance kick for this example sounds like this:
DJ Story’s Psytrance Kick

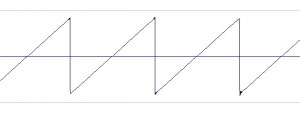
Sawtooth Wave
#2 Psytrance Bass Sound
For this I start with a sawtooth wave loaded in the simpler, and played with the volume and and frequency envelopes to get that short decay. You can also add a touch of distortion and make the pitch envelope drop quickly as done with the kick drum for added punch. The frequency, volume, and pitch should in their open state and close fast to cut off the sound. Play around with the settings until it sounds just right. Another thing you can do is put a bandpass filter to cut out some of the sub bass frequencies and/or use sidechain compression to keep the bass from interfering with the kick drum. You can also create the same sidechain ducking effect using velocity to control the volume. In my example, I just used the bandpass filter with the frequency automation sweeping up at the end and the velocity technique.
Here’s my psytrance bass loop example:
DJ Story’s Psytrance Bass
#3 Psytrance Squeaking Effects
This is where you can get really creative and experimental. For this example, I started out with a sawtooth wave in simpler. Put the loop on same as before, and played with the longer pitch and frequency envelopes and the LFO to create grinding squishy crunchy psytrance nosies until I came up with this one I liked. I’m not telling you the exact settings because it’s best just to play around and come up with something original that sounds good to your ear. One thing I’ve noticed is the lower the octave the more gritty it gets. It makes the sawtooth waveform stand out more, although sometimes really high octaves sound like a swarm of bees. Some ideas would be to add some delay or reverb for extra spatial weirdness.
Sometimes the raw dry sound does the job nicely though as in this example:
DJ Story’s Psytrance FX
Here’s what everything sounds like together:
DJ Story’s Psytrance Full Loop
Comments
Tags: Ableton Sound Design, Ableton Sound Design Tutorial, Psychedelic Trance Sounddesign, Psytrance Sound Design, Psytrance Sound Design Basics, Psytrance Sound Design Tutorial, Psytrance Theory, Sound Design, Sound Design Theory